When placed correctly, sandbags can reduce the impact of flooding on your home or business. While they won’t completely stop the water, they can help reduce how much enters your property.
Here’s some practical information to help you use sandbags to protect your home or business.
This video from the Queensland State Emergency Services shows how to sandbag your home or business.

Where to get sandbags
It's a good idea to have your own sandbags ready before a possible flood. Getting them early can help protect your home and give you peace of mind.
Your local Council may supply sandbags during flood and storm season. Contact your local Council or visit their website for more information.
You can purchase sandbags from some hardware stores and landscaping suppliers.
Filling sandbags
Use sand to fill bags. It works better than soil, clay or gravel. Only use these if sand is unavailable.
No matter the size, sandbags only need to be filled to 2/3 full.
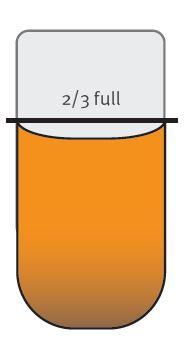
Do not overfill bags because they will be too heavy to carry.
A filled sandbag can weigh 15 – 20 kilograms.
Do not tie the top of the sandbag, unless transporting.
TIP: Sandbags may be placed in plastic bags to provide greater water resistance.
Self-inflating sandbags
Self-inflating sandbags are ready-to-use sandbags that don’t require filling. They can:
Self-inflate when they come into contact with water.
Be stored a long time and are a light weight alternative to traditional sandbags.
Be purchased from some local hardware stores or landscaping suppliers.
Placing Sandbags
Sandbags should be used in front of doorways , roller doors and brickwork vents. Make sure that you have at least one doorway that you can use to access or exit the building . You can do this by building a wall that allows the door to open.
For most buildings, sandbags should also be placed in toilets and over floor wastes and drains (e.g. laundry, shower and bath). This will prevent back flow of grey water and sewerage.
|
Tip: Most standard homes and buildings on a concrete slab can be protected with less than 25 sandbags.
Step by Step - Laying your sandbags
Place down a layer of plastic sheeting to act as a waterproof membrane.
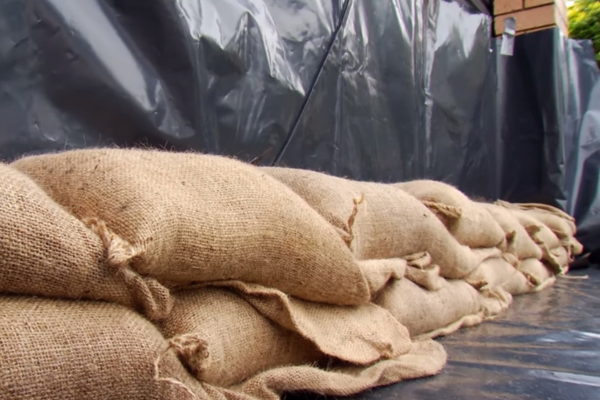
Start at one end and work to the other end.
Lay sandbags like brickwork on top of the plastic sheeting, staggering rows so the joins do not line up.
Make sure the unfilled top part of the bag is covered by the next bag.
At the end of each row, tuck the flap under the bag.
Flatten down the sandbag row before adding the next row. This will help build a better structure.
Usually two rows of sandbags are enough.
It is not always necessary to place a sandbag wall around your whole building to provide protection. This may only be necessary if it is on stumps or constructed of materials such as timber or fibro sheeting.
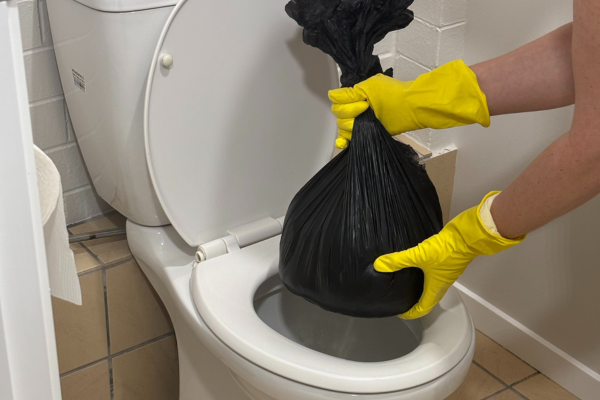
Step by Step - Sandbagging toilets
Turn off the water supply to the toilet.
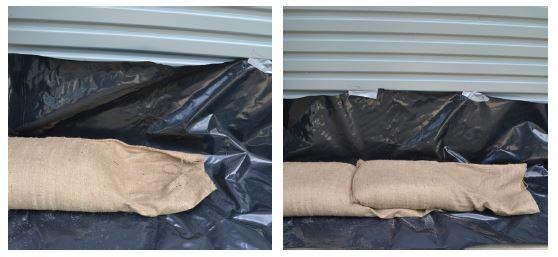
Place a one third filled sandbag (or equivalent) in a durable plastic bag.
Place sandbag inside the toilet bowl to create a barrier.
Step by Step - Sandbagging showers, floor drains and sinks
Cover openings with a strong plastic sheet.
Weigh down with sandbags to prevent back flow.
Use a drain plug if available.
Disposing of sandbags
Dispose of any sandbags that have been in contact with floodwater.
Contact your local Council for advice on safely disposing of used sandbags in your area.
Sand from unused sandbags can be scattered on lawns or as garden topsoil.
Ensure that the sand is placed where it will not wash into storm-water drains.
Caution: Wear sturdy gloves when handling wet sandbags as they can contain chemicals, waste, and disease.